SETUP / NEW LABEL
Set up printing for a new label size
A new roll or a new label size means three things agree: the media, the design and the printer. Here is where each one is set.
THE PROBLEM
The label prints too big, too small or off the edge
It almost always means the size in the design, the size in the media and the size in the printer do not match. Setting the media first keeps all three in step.
THE FIX
Step by step
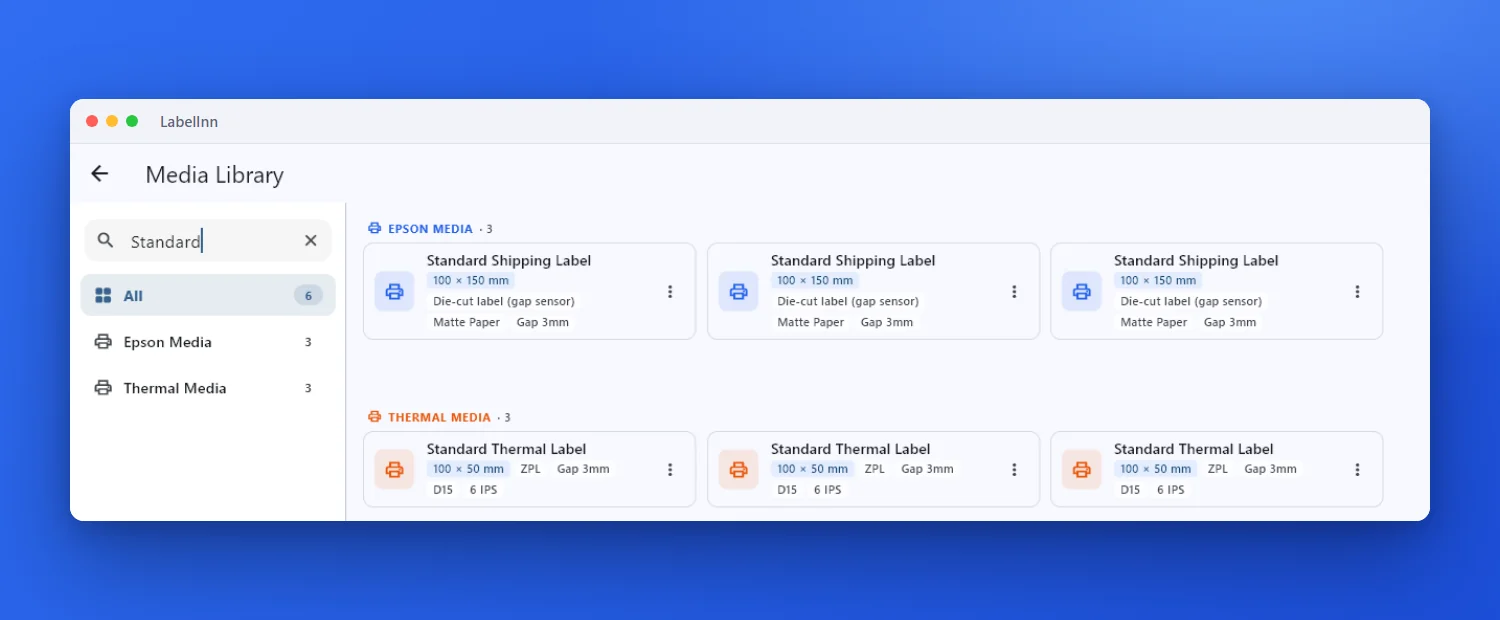
- Start a new label and search the media library New Label opens the Media Library. Type part of a name or a size to filter it; entries are grouped as Epson media and Thermal media.
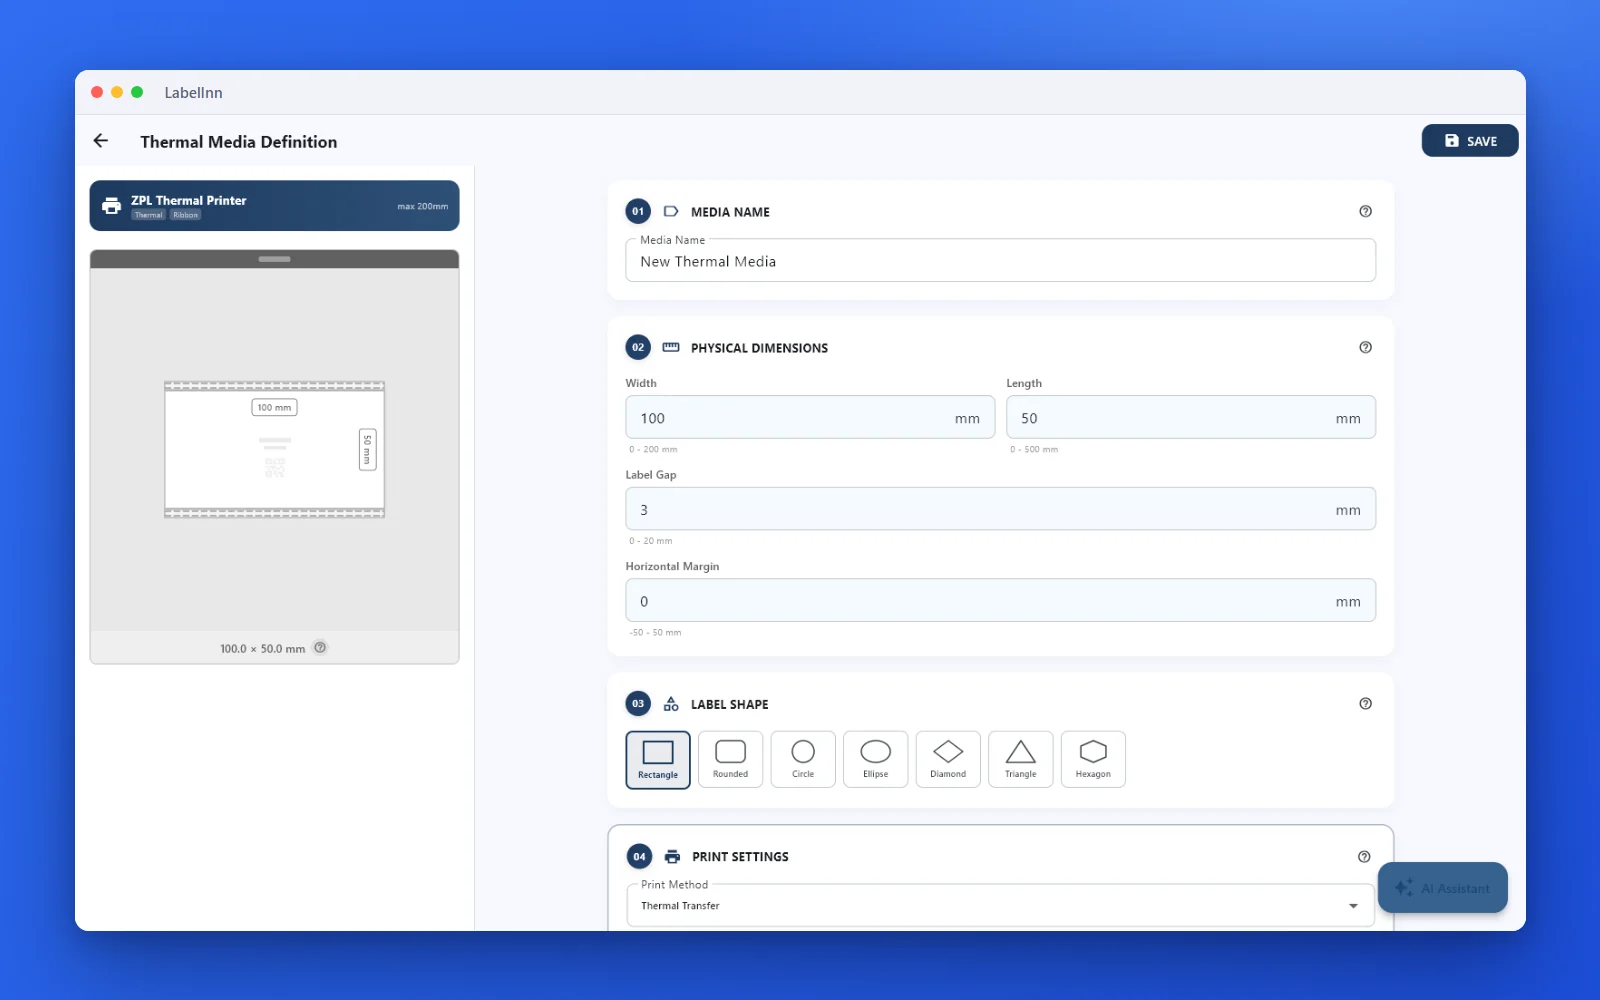
- No match? Define the media once Use Define Media to enter the width, length and gap, and choose the label shape. It is saved, so the next roll of the same size is one click.
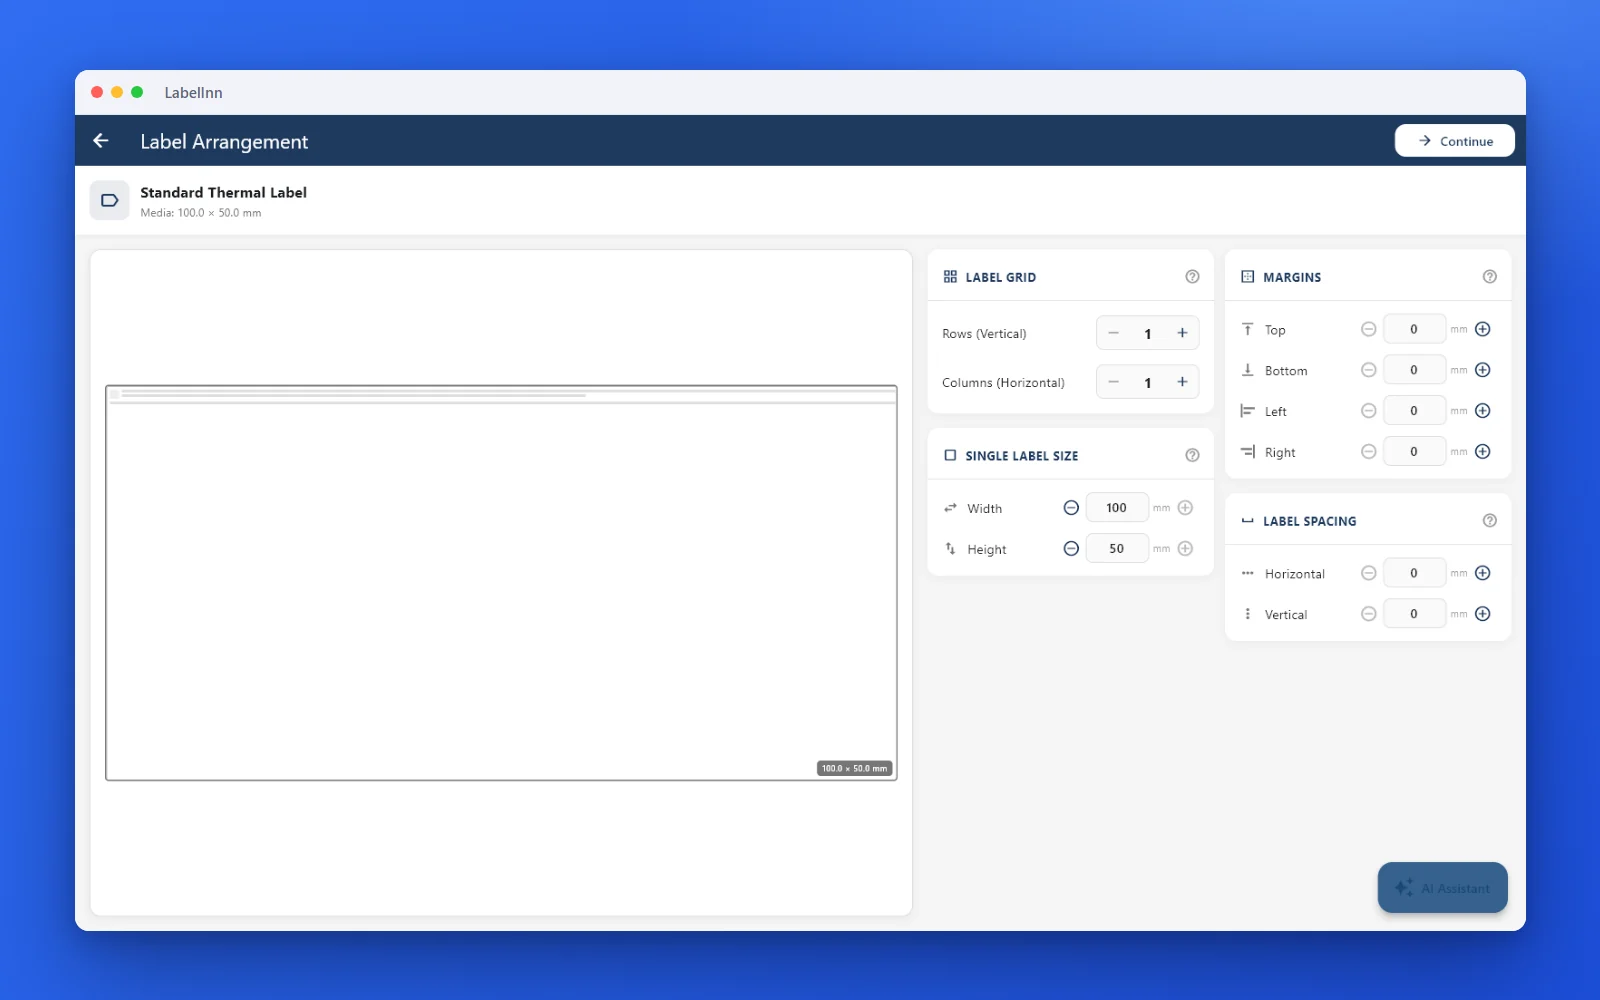
- Set the label arrangement Rows and columns for sheets, the size of a single label, margins and spacing. For one label per row leave the grid at 1 × 1.
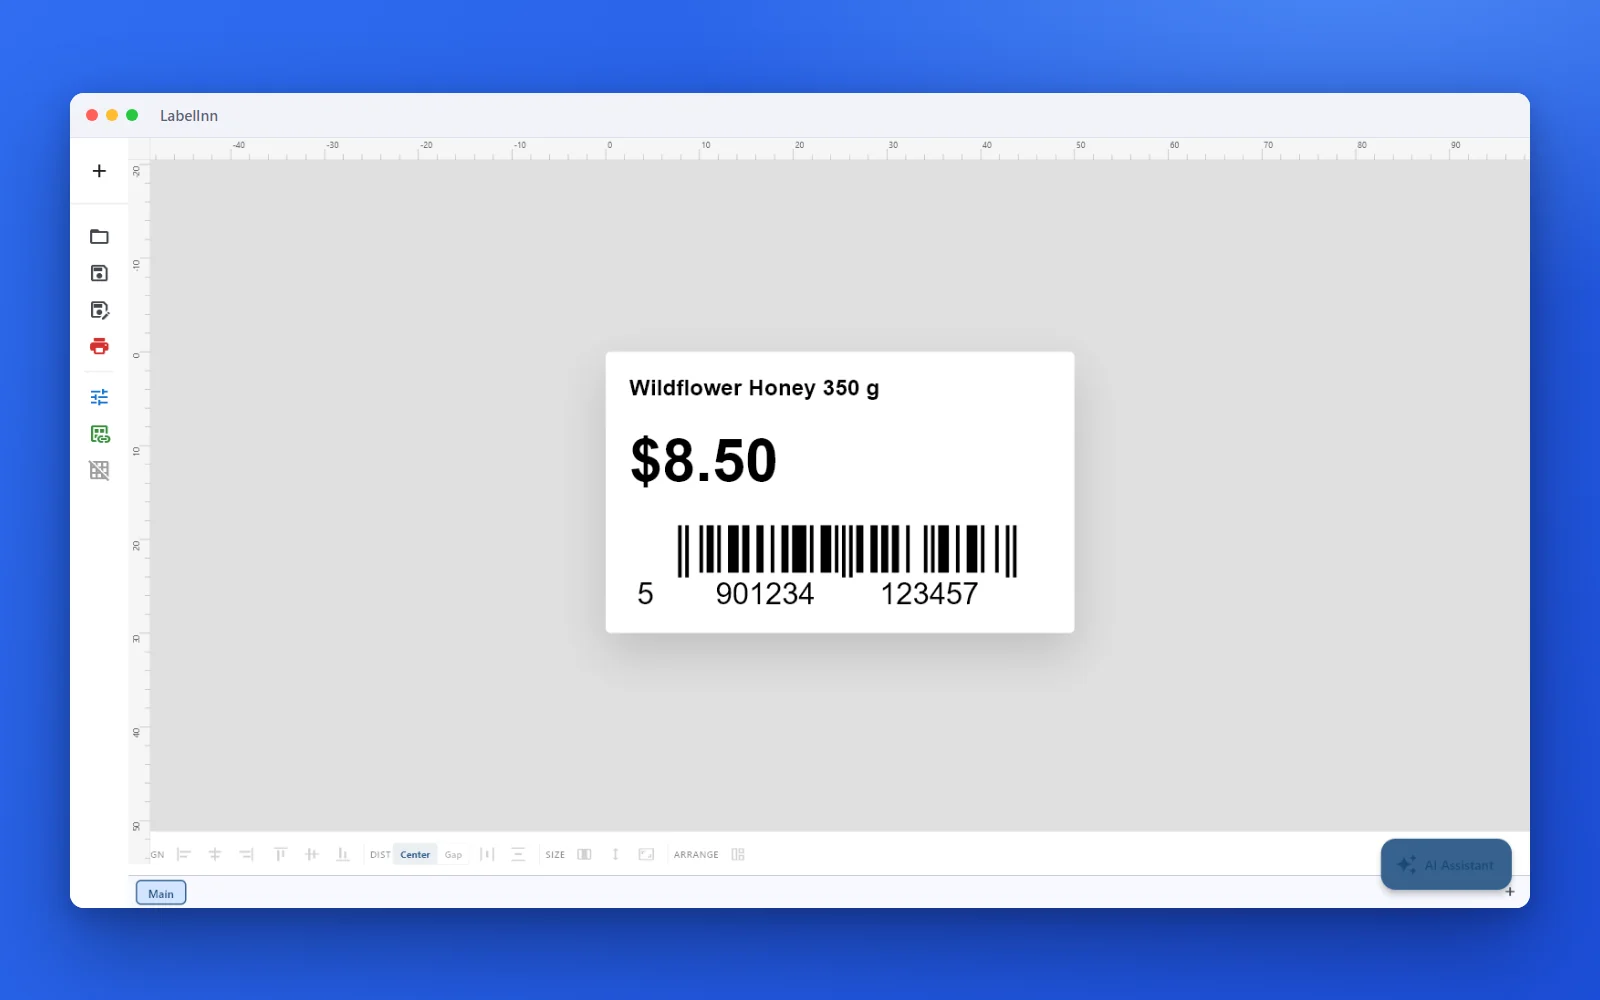
- Design the label on the right size The canvas now matches the media, so what you place is what prints. Add text, barcodes, QR codes or symbols from the + menu.
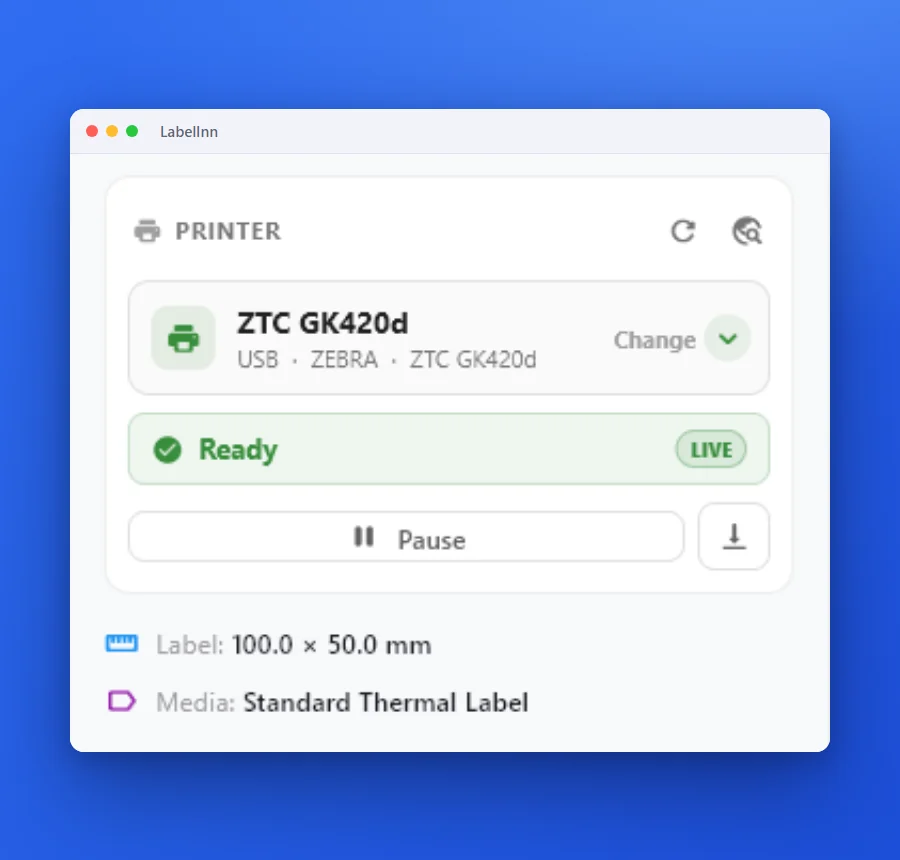
- Check the printer panel before you print The print window shows the printer, its status, the label size and the media it will use. Fix anything that is wrong here, not on the printer.
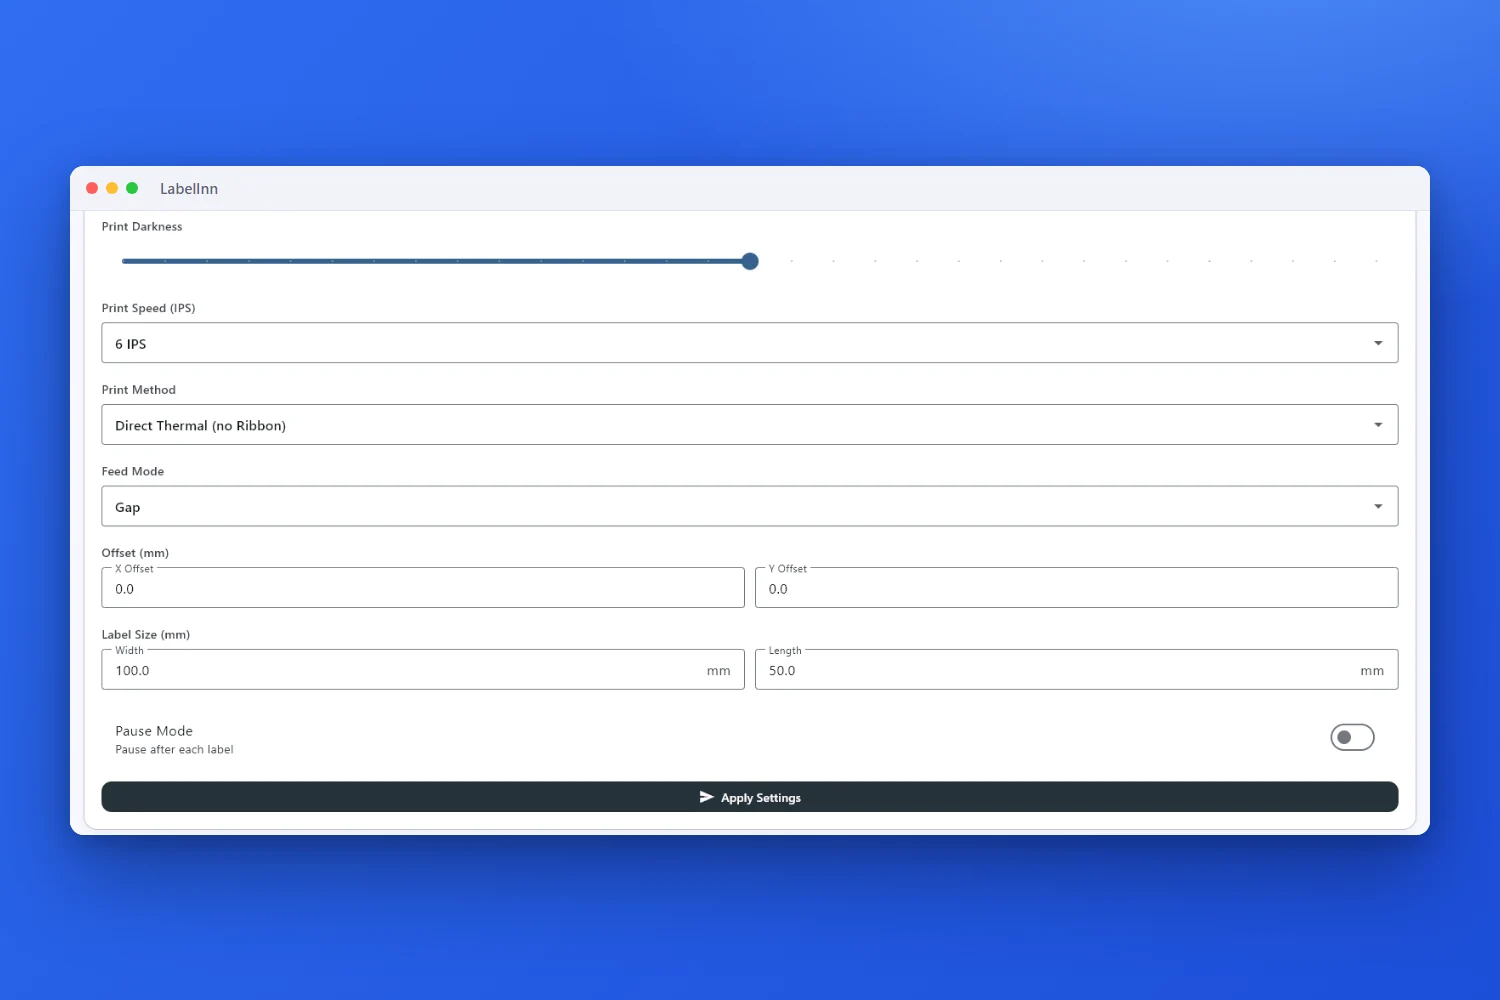
- Match the printer settings On the printer’s settings page set the label width and length, the feed mode (Gap for die-cut labels) and the offsets, then press Apply Settings.
FAQ
Frequently asked questions
What is a media definition?
It is the saved description of your label stock: width, length, gap, shape and print method. Designs use it so they start at the right size.
How do I print several labels across one sheet?
In Label Arrangement set the number of rows and columns, then the margins and the spacing between labels.
Do I have to define the media on the printer too?
The printer needs to know the label length and feed mode as well. They are on the printer’s settings page, shown above, with an Apply Settings button.
Can I reuse the media for other designs?
Yes. The media library keeps every definition, and you can search it by name or size.
KEEP GOING
Related pages
NEXT STEP / LABELINN
Define your label size once and reuse it
Download LabelInn, define the media, and print the first label at the right size. · 14-day Pro trial on signup · No credit card required · Windows, macOS, Android, Web